Guides
Webhooks
February 28, 2022
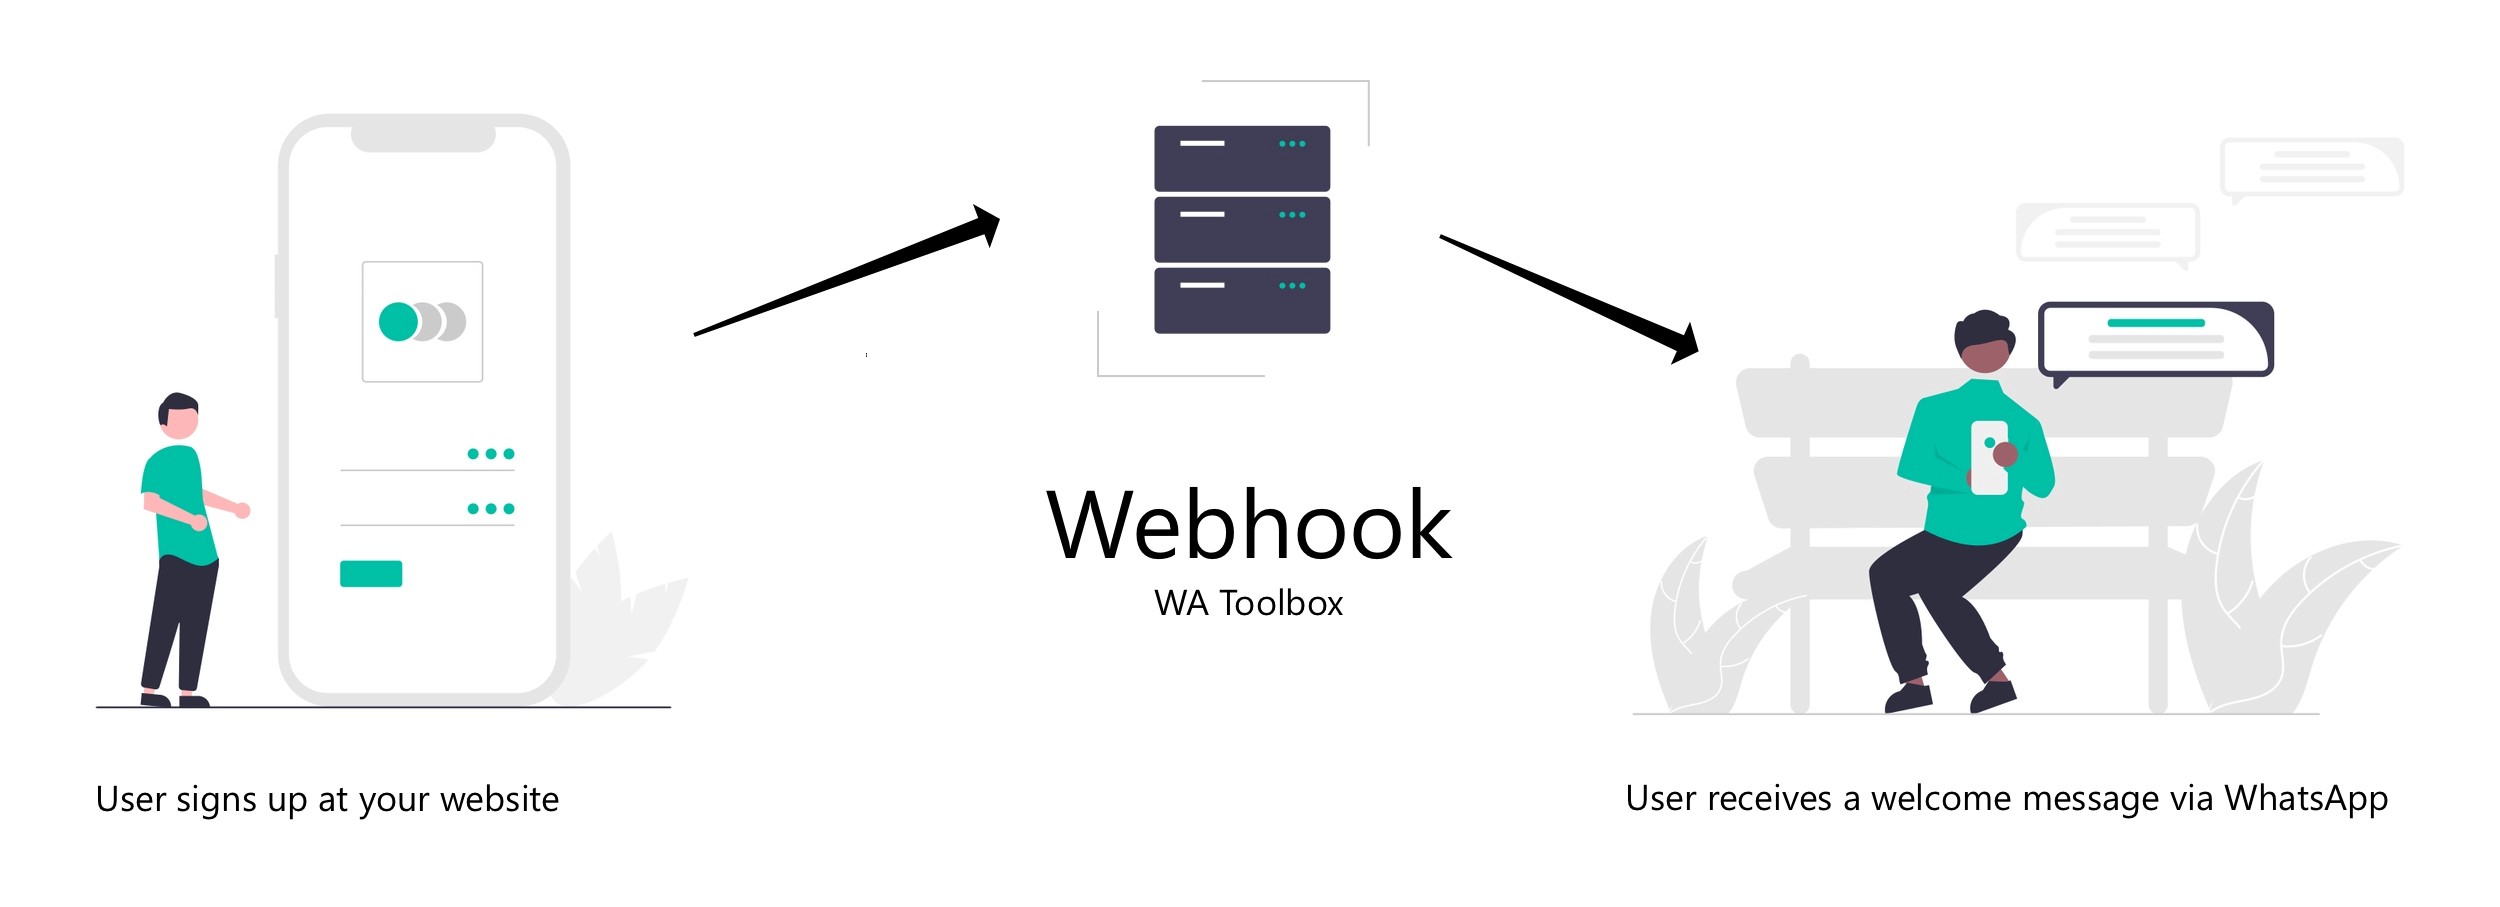
A Webhook is simply a service that receives your data and processes it in a certain way, then returns a response that you can use in your software. WA Toolbox Webhooks feature helps you to receive incoming WhatsApp data such as new messages, and send them to be processed or saved somewhere on your server or cloud system, then returns a custom response to the sender.
What are webhooks used for?
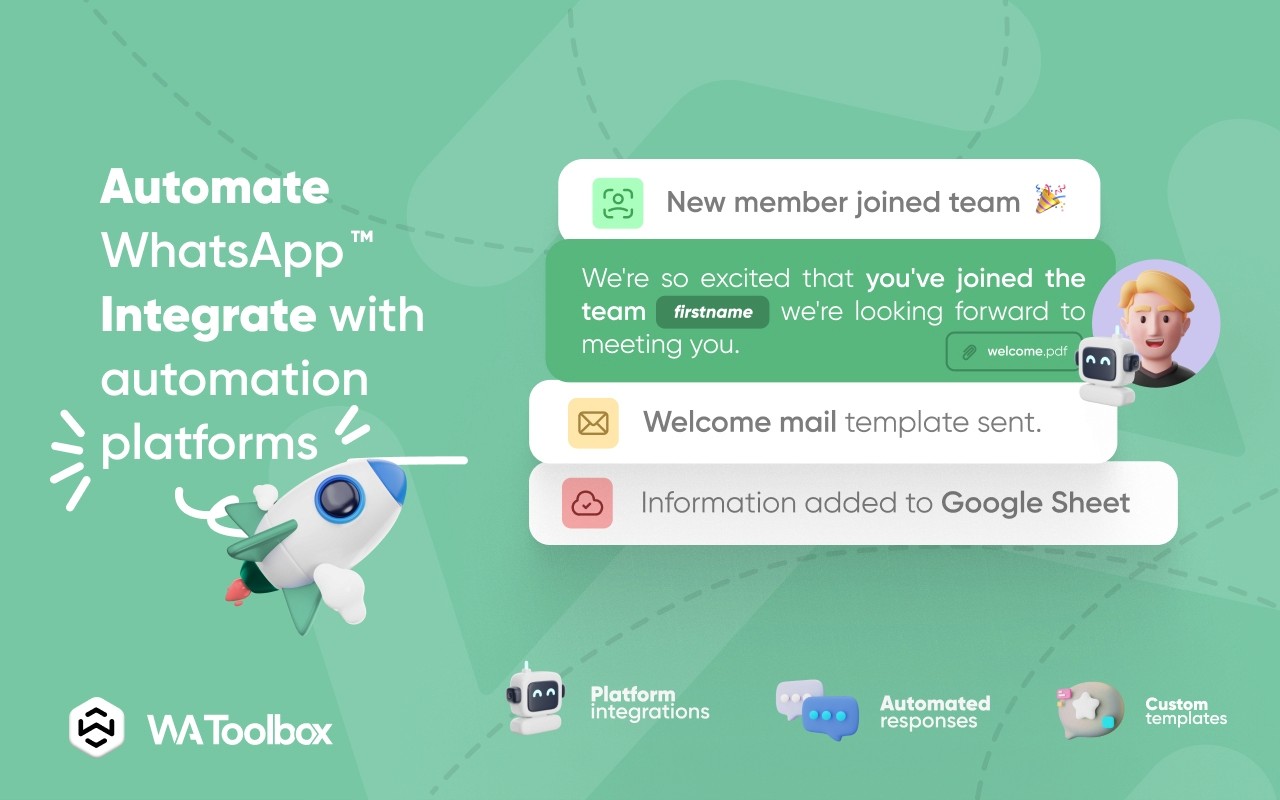
Webhooks are commonly used in automation platforms nowadays, it helps connect platforms with each other, passing data between them and interact accordingly, like sending a WhatsApp confirmation message when a user completes a purchase at an e-commerce website, or automatically adding a client to your support group once they complete their subscription process at your online academy… etc.
Webhooks in WA Toolbox are bidirectional, you can create “outgoing webhooks” that send data to other platforms whenever an action happens in your WhatsApp account (a message received, a phone call or a user joins a group.. etc), the other type you can create is the “incoming webhooks” that receives actions and data from other platforms and perform an action in your WhatsApp account (adding a user to a group or sending an invoice to a customer.. etc).
Incoming Webhooks
To setup an outgoing webhook, go to the Webhooks tab in WA Toolbox and click “New Webhook”, select the webhook type as “Incoming Webhook”, give your webhook a name to easily identify it and copy the webhook URL that you will use to trigger it from outside WA Toolbox.
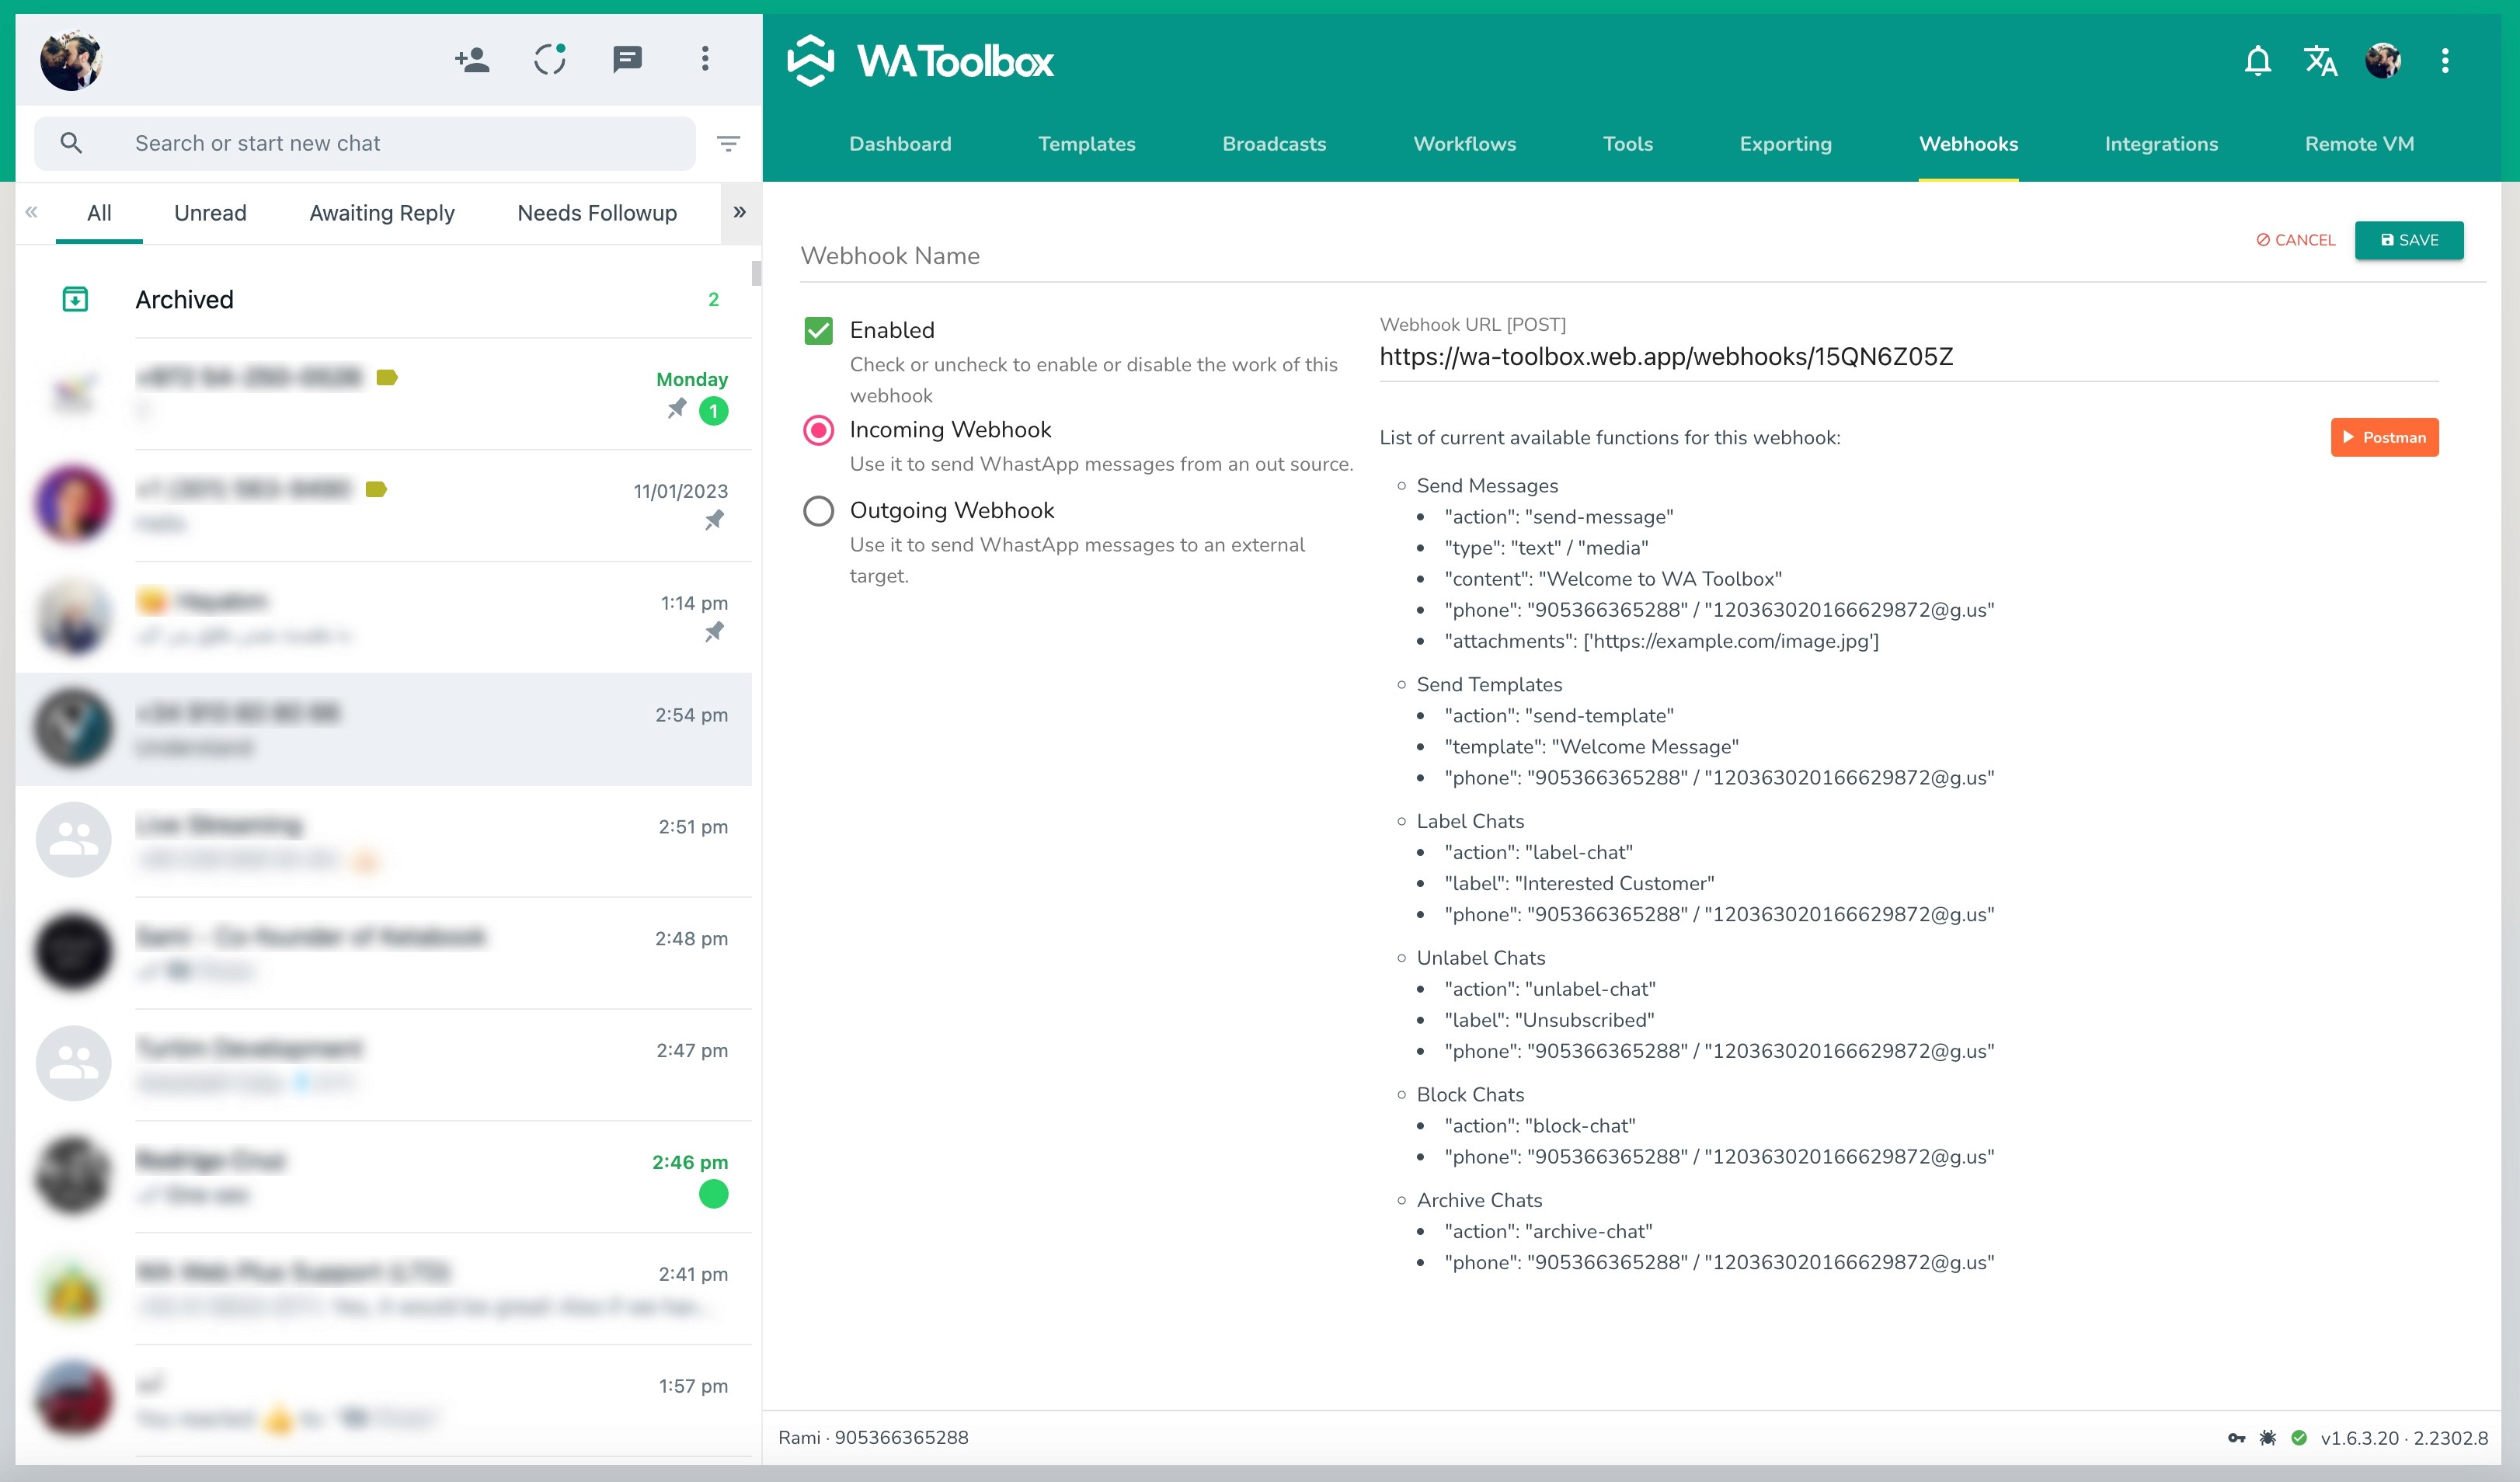
After saving the incoming webhook, you can easily send a POST request to the endpoint provided in the “Webhook URL” field with the required parameter for each action you want to trigger, here is a list of the actions WA Toolbox supports so far along with the required parameters should be sent in the request body for each action:
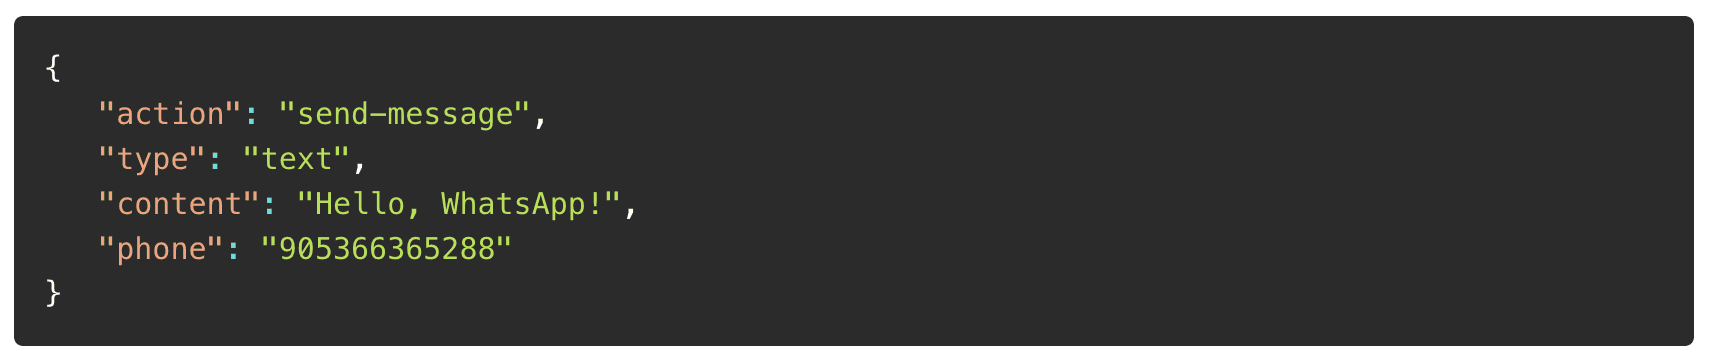
Sending Text Messages
Below is the body of the request. Make sure you insert phone numbers without any leading zeros or plus sign, and in international format.
To send messages to groups, make sure to put the Group ID in the “phone” parameter field. Group IDs can be found in the Excel file that you can download from the Export tab in WA Toolbox, an example of a Group ID would be “120363020166629872@g.us”.
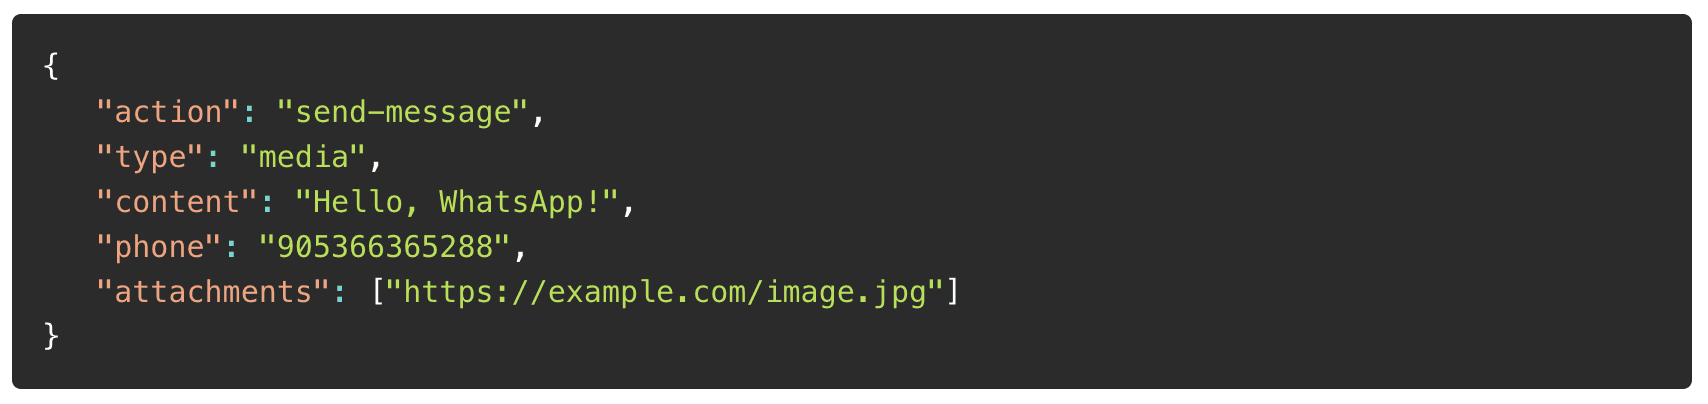
Sending Media Messages
To send media messages, such as image and video messages, make sure you pass an array of direct links to your files in the “attachments” parameter.
Sending Message Templates
To send an already prepared message template, simply send the template name as you saved it in WA Toolbox, template names here are case insensitive.

Labeling/Unlabeling Chats
Labels are specific tags that you put in chats to easily filter and identify them, this feature is only available in WhatsApp Business. To label or unlabel a chat, simply send the label name as it is saved in your WhatsApp Business account, labels names here are case insensitive.
Please note that this action only works with existing chats.

Archiving Chats
Sending chats to the archive folder.

Blocking Chats
Blocking chats prevents users from sending you more messages.

Outgoing Webhooks
To setup an outgoing webhook, go to the Webhooks tab in WA Toolbox and click “New Webhook”, select the webhook type as “Outgoing Webhook”, give your webhook a name to easily identify it and put the endpoint URL that will receive the actions from WA Toolbox into the “Webhook URL” field.
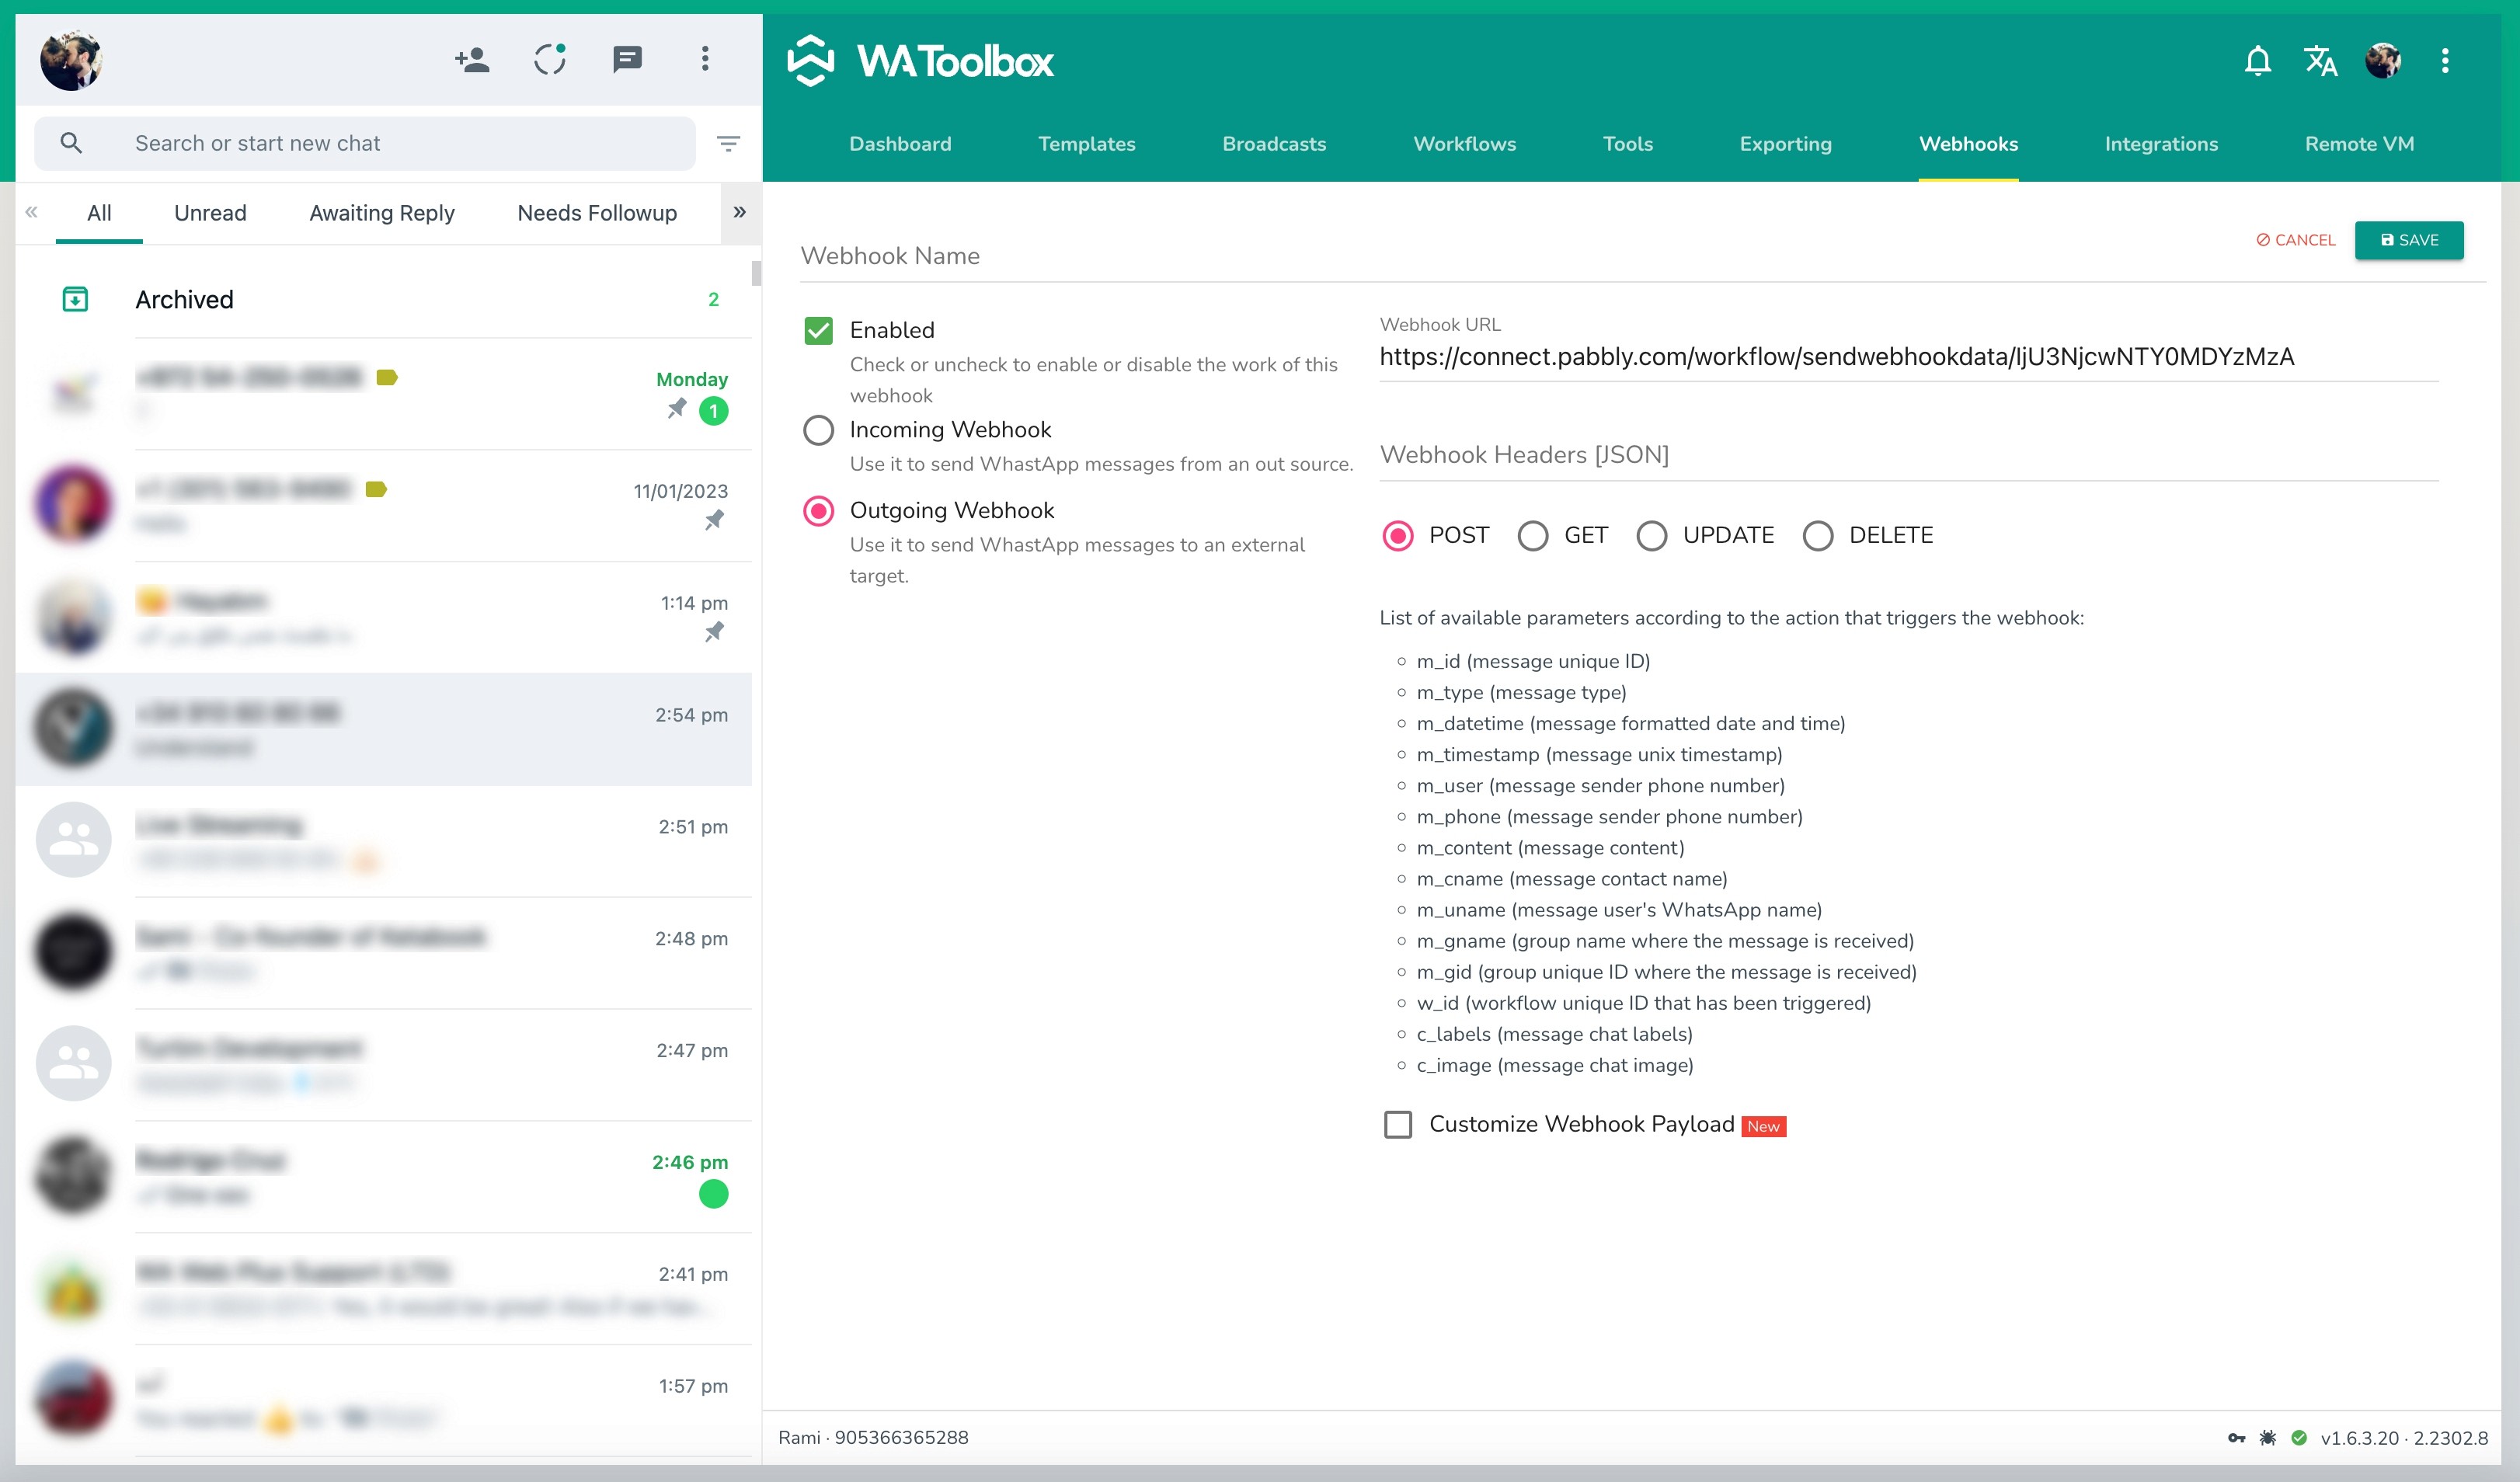
You may change the request method or add additional headers to your request in JSON format, an example of a webhook that requires Bearer authentication token would require the following headers:

Now as our webhook is ready, you can easily trigger it from a workflow or from a broadcasting campaign by selecting it when you set up the reply or the campaign. The list of the above-shown parameters will be sent to the webhook when it gets triggered.
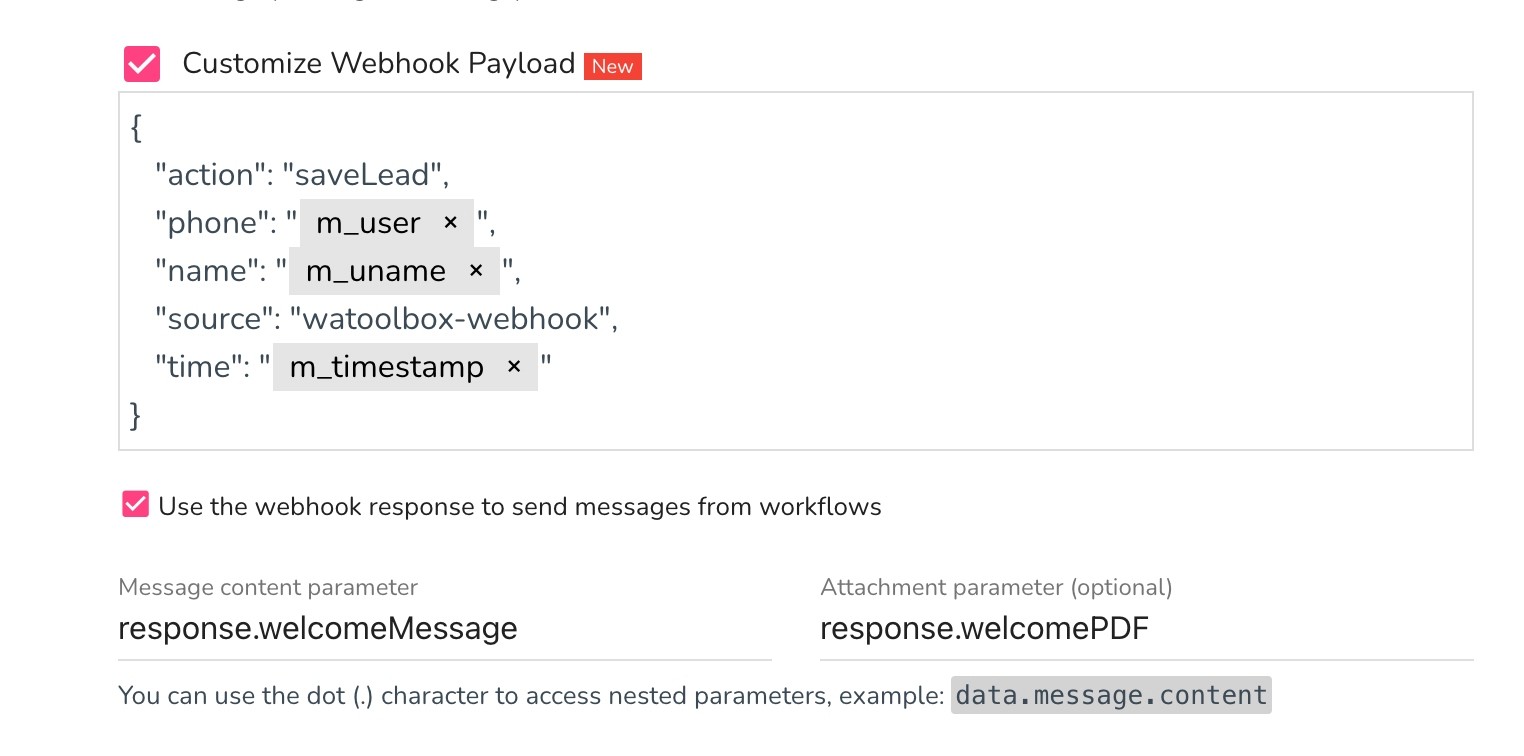
Customizing Webhook Payload
If you're integrating with a third-party service that is expecting the webhook parameters in a specific form, it is easy to customize the JSON payload of the webhook by enabling that option. This will allow you to send your own JSON object to the webhook instead of the default one, some use-cases for the need for this option is sending your new incoming leads information to your CRM software, without the need to use a third-party service in the middle to handle it.

Use Webhook Responses
If your webhook returns a response that you want to return back to the sender/event that triggered this webhook, it is possible by enabling this option for the webhook, you will be asked to identify the exact parameter location in the webhook response.
A good use-case for this option is when building a chatbot, or a service that interacts with clients' messages such as shipment tracking services, where the app collects an input, processes it to the server via the webhook, then returns the response to the sender.
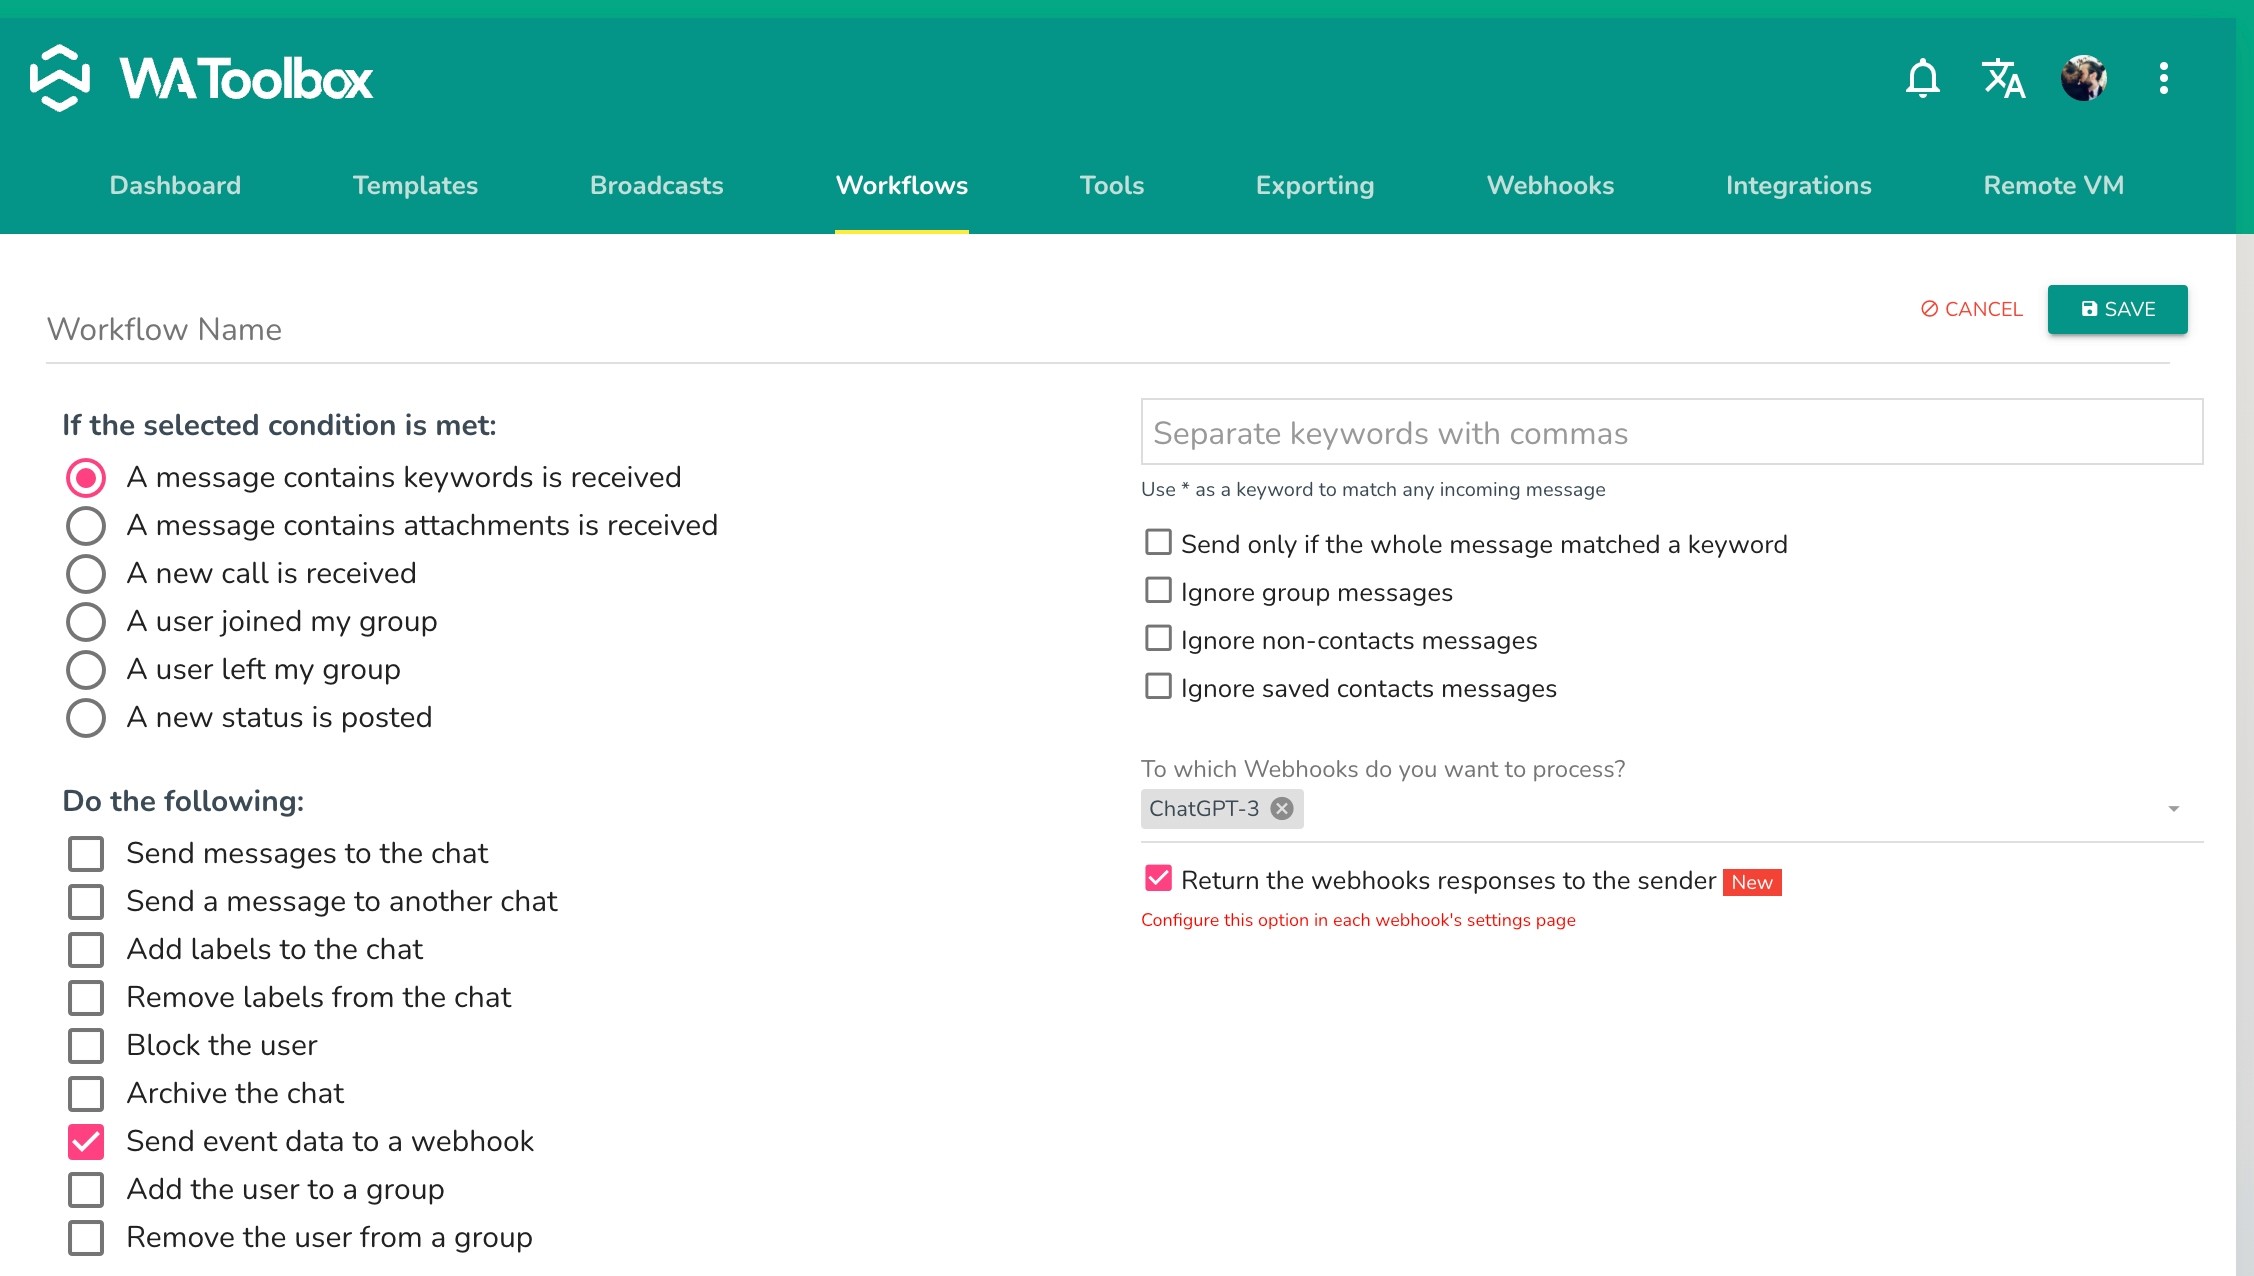
It is necessary to mention that if you're setting up your webhook to use their responses in workflows, you have to enable this option in the workflow settings as below.
Easy, isn't it?